What Does Encrypting an SD Card Mean?

Overview

An SD (Secure Digital) card is a type of memory card commonly used in digital cameras, smartphones, and other portable devices. It allows users to store and transfer data, such as photos, videos, and documents. However, as with any form of digital storage, there is a risk of the data being compromised if the SD card falls into the wrong hands. This is where encryption comes in.

Encryption is the process of converting data into a code or cipher, making it unreadable to anyone who does not have the key to decrypt it. Encrypting an SD card means that the data stored on it is protected by a password or other form of authentication, making it impossible for unauthorized individuals to access the information.

How Does Encrypting an SD Card Work?

When you encrypt an SD card, the data on it is scrambled using a complex algorithm. The encryption key used to scramble the data is generated based on the password or other form of authentication that you choose. This means that only someone with the correct password or authentication token can decrypt the data and access the information stored on the SD card.

Benefits of Encrypting an SD Card:

There are several benefits to encrypting an SD card, including:

  • Increased security: Encrypting an SD card provides an extra layer of security, making it more difficult for unauthorized individuals to access the data stored on it.
  • Protection against theft: If your device is stolen or lost, encrypting the SD card ensures that the data stored on it cannot be accessed by the thief.
  • Compliance with regulations: In some industries, such as healthcare and finance, there are regulations that require the encryption of sensitive data. Encrypting an SD card can help ensure compliance with these regulations.

what-does-encrypt-sd-card-mean2

FAQs

Q: Can I encrypt an SD card on my phone?

A: Yes, many smartphones have built-in encryption features that allow you to encrypt the data on your SD card.

Q: Will encrypting an SD card slow down my device?

A: Encrypting an SD card may cause a slight decrease in performance, but it is typically negligible.

Q: Can I still access my encrypted SD card if I forget the password?

A: No, if you forget the password or other form of authentication used to encrypt the SD card, the data on it will be permanently inaccessible.

Conclusion

Encrypting an SD card is a simple and effective way to protect the data stored on it from unauthorized access. It provides an added layer of security for sensitive information, such as personal photos, financial documents, and medical records. With built-in encryption features on many devices, encrypting an SD card has become an easy and accessible way to safeguard your data.

How to Fix a Damaged SD Card on an Android Phone

Overview

SD cards are a convenient way to expand the storage capacity of your Android phone. However, they can sometimes become damaged or corrupted due to various reasons, such as improper ejection, physical damage, or virus attacks. When this happens, your phone may not be able to recognize the SD card, or you may encounter errors when trying to access files stored on it.

Fortunately, there are several methods you can try to fix a damaged SD card on an Android phone. In this guide, we’ll cover some of the most common solutions to SD card problems on Android devices, including formatting the SD card, running a disk check, and using data recovery software.

How to Fix a Damaged SD Card on an Android Phone:

  • Restart your phone: Sometimes, a simple restart can fix issues with your SD card. Turn off your phone, remove the SD card, and reboot your phone. Then, reinsert the SD card and check if it’s being recognized by your phone.
  • Clean the SD card and card slot: Dust and debris can accumulate on your SD card and card slot over time, causing connectivity issues. Use a soft cloth or compressed air to clean the SD card and the card slot.
  • Format the SD card: If your SD card is not being recognized by your phone, you may need to format it. Note that formatting will erase all data on the SD card, so make sure to back up any important files before proceeding. To format the SD card, go to Settings > Storage > SD card > Format.
  • Run a disk check: If your SD card is recognized by your phone but you’re encountering errors when trying to access files, you can run a disk check to fix any errors on the card. To do this, go to Settings > Storage > SD card > More > Scan SD card.
  • Use data recovery software: If you’ve accidentally deleted files on your SD card or the card is damaged beyond repair, you can use data recovery software to recover lost data. There are several free and paid data recovery tools available online, such as Recuva, EaseUS Data Recovery Wizard, and Disk Drill.

how-to-fix-damaged-sd-card-on-an-android-phone2

FAQs

Why is my Android phone not reading my SD card?

There could be several reasons why your phone is not reading your SD card, such as physical damage, improper ejection, or a corrupted file system. Try the solutions mentioned in this guide to fix the issue.

Can I recover data from a damaged SD card?

Yes, you can use data recovery software to recover lost data from a damaged SD card. However, there’s no guarantee that you’ll be able to recover all files, and some files may be permanently lost.

Will formatting my SD card erase all data?

Yes, formatting your SD card will erase all data on it. Make sure to back up any important files before formatting the card.

Conclusion

SD cards are a convenient way to store and access data on an Android phone, but they can sometimes become damaged or corrupted. If you’re encountering issues with your SD card, such as not being recognized by your phone or encountering errors when accessing files, try the solutions mentioned in this guide, such as formatting the card, running a disk check, or using data recovery software. Remember to back up your data regularly to prevent data loss in case of SD card failure.

How to View SD Card on iPhone – Complete Guide

Overview

iPhones do not have built-in SD card readers, so viewing your SD card on your iPhone can seem like a challenge. However, there are several options available to view and transfer files from your SD card to your iPhone. In this guide, we’ll cover the following methods:

  • Using a Lightning to SD Card Camera Reader
  • Using a Lightning to USB Camera Adapter
  • Using a third-party wireless SD card reader

How to View SD Card on iPhone:

Method 1: Using a Lightning to SD Card Camera Reader

This is the easiest and most straightforward method of accessing your SD card on your iPhone. To do this, you’ll need a Lightning to SD Card Camera Reader, which can be purchased from Apple or third-party retailers.

Here’s how to use it:

  • Insert your SD card into the SD card slot on the Lightning to SD Card Camera Reader.
  • Connect the Lightning to SD Card Camera Reader to your iPhone.
  • Open the Photos app on your iPhone.
  • Your SD card should appear as an option under the Import tab.

Method 2: Using a Lightning to USB Camera Adapter

If you have a USB SD card reader, you can use a Lightning to USB Camera Adapter to connect it to your iPhone. Here’s how:

  1. Insert your SD card into your USB SD card reader.
  2. Connect the USB SD card reader to the Lightning to USB Camera Adapter.
  3. Connect the Lightning to USB Camera Adapter to your iPhone.
  4. Open the Photos app on your iPhone.
  5. Your SD card should appear as an option under the Import tab.

Method 3: Using a Third-Party Wireless SD Card Reader

If you don’t have a Lightning to SD Card Camera Reader or Lightning to USB Camera Adapter, you can use a third-party wireless SD card reader to access your SD card on your iPhone.

Here’s how:

  • Download the app provided by your wireless SD card reader manufacturer.
  • Insert your SD card into the wireless SD card reader.
  • Connect your iPhone to the wireless SD card reader’s Wi-Fi network.
  • Open the app on your iPhone and follow the instructions provided by the manufacturer.

how-to-view-sd-card-on-iphone2

FAQs

Q: Can I view RAW files from my SD card on my iPhone?

A: Yes, you can view RAW files on your iPhone using the Photos app or a third-party app that supports RAW files.

Q: Can I transfer files from my iPhone to my SD card?

A: Yes, you can transfer files from your iPhone to your SD card using the same Lightning to SD Card Camera Reader or Lightning to USB Camera Adapter.

Q: Can I use an SD card larger than 32GB on my iPhone?

A: Yes, you can use SD cards up to 2TB on your iPhone, depending on the model.

Conclusion

Viewing an SD card on your iPhone is not as complicated as it may seem. Whether you choose to use a Lightning to SD Card Camera Reader, Lightning to USB Camera Adapter, or a third-party wireless SD card reader, you can easily access your SD card and transfer files to and from your iPhone. With these methods, you can expand your iPhone’s storage capacity and enjoy your favorite media on the go.

How to Read Micro SD Card: A Comprehensive Guide

Overview

Micro SD cards are commonly used to store data on devices such as smartphones, cameras, and other portable devices. However, if you’re not familiar with the process, reading a micro SD card can be a bit confusing. In this article, we’ll provide a comprehensive guide on how to read a micro SD card.

To read a micro SD card, you’ll need a few tools, including a micro SD card reader and a computer. Once you have these tools, follow these step-by-step instructions:

  • Insert the micro SD card into the card reader: Ensure that the micro SD card is properly inserted into the card reader. Most card readers have a slot for the micro SD card, so it should fit snugly.
  • Connect the card reader to your computer: Connect the card reader to your computer using a USB port. Most card readers come with a USB cable that you can use for this purpose.
  • Access the micro SD card on your computer: Once the card reader is connected, your computer should recognize it and allow you to access the micro SD card. If the micro SD card does not appear on your computer, try unplugging the card reader and plugging it back in. If that doesn’t work, try restarting your computer.
  • View the contents of the micro SD card: Once you’ve accessed the micro SD card on your computer, you can view its contents. You can then copy, move, or delete files as needed.

how-to-read-micro-sd-card2

FAQs

Q: Why can’t I access the micro SD card on my computer?

A: There are several reasons why you may not be able to access the micro SD card on your computer. First, ensure that the micro SD card is properly inserted into the card reader. If that doesn’t work, try using a different USB port or restarting your computer. If none of these steps work, the micro SD card may be damaged or corrupted.

Q: Can I read a micro SD card on my smartphone?

A: Yes, you can read a micro SD card on your smartphone if it has a micro SD card slot. Simply insert the micro SD card into the slot and access it through your phone’s file manager.

Q: Can I read a micro SD card without a card reader?

A: You can read a micro SD card without a card reader if your device has a built-in micro SD card slot. However, if your device does not have a micro SD card slot, you’ll need to use a card reader to access the micro SD card.

Conclusion

Reading a micro SD card is a simple process that requires just a few tools and some basic knowledge. By following the step-by-step instructions provided in this guide, you should be able to read a micro SD card with ease. If you encounter any issues, refer to the FAQs section for troubleshooting tips. With these tips in mind, you’ll be able to access your micro SD card and manage its contents in no time.

How to Transfer Files from Nook to SD Card

Overview

The Nook is a popular e-reader that allows you to store a vast collection of books, documents, and other files. However, if you’re running out of space on your Nook and need to free up some storage, transferring files to an SD card is an excellent solution. Transferring files from your Nook to an SD card can also help you manage your files more efficiently, ensuring that you can access them whenever you need them.

Transferring files from your Nook to an SD card can be a simple process, but it’s important to follow the right steps to avoid any potential issues. In this guide, we’ll walk you through the steps to transfer files from your Nook to an SD card, including tips on how to manage your files effectively.

How to Transfer Files from Nook to SD Card:

  • Insert the SD card into your Nook: The first step to transferring files from your Nook to an SD card is to insert the SD card into your device. Ensure that your Nook is turned off before you insert the SD card.
  • Turn on your Nook: Once you’ve inserted the SD card, turn on your Nook and wait for it to recognize the card.
  • Access your files: To transfer files from your Nook to the SD card, you’ll need to access your files. Go to the “Library” section of your Nook and select the files that you want to transfer.
  • Copy the files: Once you’ve selected the files, you’ll need to copy them to the SD card. To do this, select the “Copy to SD card” option and wait for the transfer to complete.
  • Eject the SD card: Once the transfer is complete, eject the SD card from your Nook. You can now use the SD card to access your files on other devices.

how-to-transfer-files-from-nook-to-sd-card2

FAQs

Q: Can I transfer all types of files from my Nook to an SD card?

A: Yes, you can transfer all types of files, including books, documents, and images, from your Nook to an SD card.

Q: How do I know if my Nook recognizes the SD card?

A: Once you’ve inserted the SD card, turn on your Nook and wait for it to recognize the card. You should see a notification on the screen indicating that the SD card has been detected.

Q: Can I transfer files from an SD card to my Nook?

A: Yes, you can transfer files from an SD card to your Nook using the same steps mentioned above. Instead of selecting “Copy to SD card,” select “Copy to Nook” to transfer files from the SD card to your device.

Conclusion

Transferring files from your Nook to an SD card is a simple process that can help you manage your files more efficiently. With our step-by-step guide, you can easily transfer files from your Nook to an SD card and free up space on your device. Don’t forget to eject the SD card from your Nook once the transfer is complete to avoid any potential issues.

How to Make SD Card Default Storage on HTC Desire 626s

Overview

The HTC Desire 626s is a budget smartphone with 8 GB of internal storage. This may not be enough for users who like to store a lot of music, photos, or videos on their devices. Fortunately, the HTC Desire 626s supports the use of an SD card, which you can use to expand your storage capacity. In this article, we will show you how to make SD card default storage on HTC Desire 626s and enjoy the benefits of having more space on your device.

How to Make SD Card Default Storage on HTC Desire 626s:

Step 1: Insert the SD card into your HTC Desire 626s.

Step 2: Go to “Settings” and scroll down to “Storage & USB.”

Step 3: Tap on “Storage” and then tap on the SD card.

Step 4: Tap the three dots in the top right corner and select “Storage Settings.”

Step 5: Tap on “Format as Internal” and then select “Erase & Format.”

Step 6: Wait for the SD card to format and then select “Move now” to move your data to the SD card.

Step 7: Restart your HTC Desire 626s.

Step 8: Go back to “Settings” and select “Storage & USB.”

Step 9: Tap on “Storage” and then tap on the SD card.

Step 10: Tap the three dots in the top right corner and select “Set as Default Storage.”

Step 11: Tap on “OK” to confirm.

how-to-make-sd-card-default-storage-on-htc-desire-626s1

FAQs

Q: Will formatting the SD card erase all my data?

A: Yes, formatting the SD card will erase all data on it. Make sure to back up your data before formatting.

Q: Can I still use my SD card on other devices after formatting it as internal storage?

A: No, the SD card will only work on the device it was formatted on.

Q: Will using an SD card slow down my HTC Desire 626s?

A: No, using an SD card will not slow down your HTC Desire 626s.

Conclusion

Expanding the storage capacity of your HTC Desire 626s by using an SD card is a great way to free up internal storage space. By following the simple steps provided in this article, you can make SD card default storage on HTC Desire 626s and enjoy the benefits of having more space on your device. Remember to back up your data before formatting the SD card, and keep in mind that the SD card will only work on the device it was formatted on.

Understanding Class 10 SD Cards: Everything You Need to Know

Overview

If you’ve ever used a digital camera, phone, or other device that uses a memory card for storage, you’re probably familiar with the various types of cards available. One of the most popular and widely used types of memory card is the SD card, which stands for Secure Digital. SD cards come in a range of different sizes and capacities, but one of the most important factors to consider when choosing a card is its speed class.

The speed class of an SD card refers to its data transfer rate, or how quickly it can read and write data. Class 10 SD cards are one of the fastest types of SD cards available, making them ideal for use in high-performance devices such as digital cameras and video cameras. In this article, we’ll take a closer look at what makes Class 10 SD cards so special, and what you need to know to choose the right one for your needs.

What is a Class 10 SD Card?

  • A Class 10 SD card is a type of memory card that has a minimum data transfer rate of 10 MB/s. This means that it can read and write data at a speed of at least 10 megabytes per second. This high-speed performance makes Class 10 SD cards ideal for use in devices that require fast data transfer rates, such as digital cameras and video cameras.
  • Class 10 SD cards are available in a range of different sizes and capacities, from 2 GB up to 512 GB or more. They are also compatible with a wide range of devices that support SD cards, including smartphones, tablets, and laptops.

what-is-a-class-10-sd-card2

FAQs

Q: What devices are Class 10 SD cards compatible with?

A: Class 10 SD cards are compatible with a wide range of devices, including digital cameras, video cameras, smartphones, tablets, and laptops.

Q: How do I know if my device supports Class 10 SD cards?

A: Check the manufacturer’s specifications for your device to see what type of SD card it supports. Many devices will also have an SD card slot that is labeled with the types of cards that are compatible.

Q: Are Class 10 SD cards more expensive than other types of SD cards?

A: Yes, Class 10 SD cards are generally more expensive than lower speed class cards. However, the increased performance and faster data transfer rates make them a worthwhile investment for users who need high-speed storage.

Q: What is the difference between a Class 10 SD card and a UHS-I SD card?

A: UHS-I (Ultra High Speed) SD cards are a newer type of SD card that offer even faster data transfer rates than Class 10 cards. However, not all devices support UHS-I cards, so it’s important to check your device’s specifications before purchasing.

Conclusion

If you’re looking for a high-speed storage solution for your digital camera, phone, or other device, a Class 10 SD card is an excellent choice. With data transfer rates of at least 10 MB/s, these cards can handle even the most demanding storage needs. Keep in mind that Class 10 SD cards are generally more expensive than lower speed class cards, but the increased performance is well worth the investment for users who require fast data transfer rates. When choosing a Class 10 SD card, be sure to check the manufacturer’s specifications for your device to ensure compatibility, and consider factors such as capacity, brand, and price to find the card that best fits your needs.

Understanding the Lifespan of an SD Card: What You Need to Know

Overview

SD cards are a popular form of removable storage that are used in digital cameras, smartphones, tablets, and other devices. They are compact, lightweight, and can store large amounts of data. However, many users are not aware of the limited lifespan of SD cards. Like any form of storage media, SD cards have a finite number of write cycles, after which they become unreliable and may fail to store data or become corrupt.

The lifespan of an SD card depends on various factors, including the quality of the card, the amount of data written to it, the frequency of use, and environmental factors such as temperature and humidity. In this article, we will discuss each of these factors in detail and provide tips on how to extend the lifespan of an SD card.

what-is-the-lifespan-of-an-sd-card2

FAQs

Q: How long do SD cards typically last?

A: The lifespan of an SD card varies depending on various factors, but most cards are designed to last for several years of normal use.

Q: Can an SD card last forever?

A: No, SD cards have a limited lifespan due to the finite number of write cycles they can endure.

Q: How can I tell if my SD card is nearing the end of its lifespan?

A: Signs that an SD card may be nearing the end of its lifespan include slow read/write speeds, errors when saving or accessing data, and corruption of stored data.

Q: Can I extend the lifespan of my SD card?

A: Yes, there are several ways to extend the lifespan of an SD card, including avoiding extreme temperatures and humidity, using a high-quality card, and minimizing the amount of data written to the card.

Conclusion

In conclusion, SD cards are a popular and convenient form of storage, but users should be aware of their limited lifespan. The lifespan of an SD card depends on various factors, including the quality of the card and the frequency and amount of data written to it. By following the tips outlined in this article, users can extend the lifespan of their SD cards and ensure that their data remains safe and accessible. Remember to always handle your SD card with care, avoid exposing it to extreme temperatures and humidity, and backup your data regularly to avoid losing important information.

How to Recover Deleted Photos from SD Card

An SD (Secure Digital) card is a popular storage medium used in various devices such as cameras, smartphones, and tablets. However, accidents happen, and you might accidentally delete your precious photos from an SD card. Fortunately, there are several ways to recover deleted photos from an SD card. In this guide, we will explore different methods to help you recover your lost photos.

How to Recover Deleted Photos from SD Card:

There are several ways to recover deleted photos from an SD card. Here are some of the most effective methods:

Method 1: Use SD Card Recovery Software

Using SD card recovery software is one of the most effective ways to recover deleted photos from an SD card. There are several free and paid software options available. Some of the most popular options include EaseUS Data Recovery Wizard, Recuva, and Disk Drill. Here are the steps to recover deleted photos using SD card recovery software:

Step 1: Download and install the SD card recovery software on your computer.

Step 2: Connect your SD card to your computer using an SD card reader.

Step 3: Launch the SD card recovery software and select the SD card from the list of available drives.

Step 4: Scan the SD card for deleted photos.

Step 5: Preview the recovered photos and select the ones you want to save.

Step 6: Save the recovered photos to a location on your computer.

Method 2: Use Command Prompt

If you are comfortable using the command prompt, you can use it to recover deleted photos from an SD card. Here are the steps:

Step 1: Connect your SD card to your computer using an SD card reader.

Step 2: Press the Windows key + R to open the Run dialog box.

Step 3: Type cmd and press Enter to open the command prompt.

Step 4: Type chkdsk [drive letter]: /f and press Enter. Replace [drive letter] with the letter assigned to your SD card.

Step 5: Type Y and press Enter to confirm the disk check.

Step 6: Type [drive letter]:>attrib -h -r -s /s /d . and press Enter. Replace [drive letter] with the letter assigned to your SD card.

Step 7: Wait for the command prompt to finish scanning your SD card.

Step 8: Check the SD card for the recovered photos.

how-to-recover-deleted-photos-from-sd-card2

FAQs

Q: Can I recover photos from a formatted SD card?

A: Yes, you can recover photos from a formatted SD card using SD card recovery software.

Q: Can I recover photos from a physically damaged SD card?

A: It depends on the extent of the physical damage. If the damage is severe, it may not be possible to recover photos from the SD card.

Q: How can I prevent accidentally deleting photos from an SD card?

A: You can prevent accidentally deleting photos from an SD card by being careful when using the device and by regularly backing up your photos.

Conclusion

Losing precious photos can be a frustrating experience, but with the right tools and techniques, it is possible to recover them. In this guide, we have discussed two effective methods of recovering deleted photos from an SD card. We have also provided answers to some frequently asked questions about SD card data recovery. Remember to always be careful when using your device and to regularly back up your photos to prevent data loss.

How to Check the Health of Your SD Card

Overview

SD cards are commonly used in digital cameras, smartphones, and other portable devices to store photos, videos, and other data. However, like any other storage device, SD cards can also fail or become corrupt, resulting in data loss.

It is important to regularly check the health of your SD card to ensure that your data is safe and secure. In this article, we will discuss the common signs of a failing SD card, various tools to check the health of your SD card, and steps to take to ensure that your data is safe and secure.

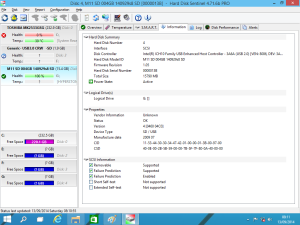
How do I check the health of my SD card?

There are several ways to check the health of your SD card, including:

  • Check for physical damage: The first step in checking the health of your SD card is to visually inspect it for any physical damage. Look for cracks, scratches, or other signs of damage.
  • Check for errors: SD cards can develop errors over time, which can cause data loss. To check for errors, you can use the built-in error-checking tool on your computer. On Windows, you can right-click on the SD card in File Explorer, select Properties, then click on the Tools tab and select “Check” under Error checking. On a Mac, you can use the Disk Utility app to check for errors.
  • Check the capacity: SD cards have a limited number of write cycles, which means that they can only be written to a certain number of times before they fail. To check the capacity of your SD card, you can use a tool like H2testw, which will write and verify data on your SD card to determine its capacity.
  • Check the speed: The speed of your SD card can also affect its health and performance. To check the speed of your SD card, you can use a tool like CrystalDiskMark, which will measure the read and write speeds of your SD card.

how-do-i-check-the-health-of-my-sd-card2

FAQs

What are the common signs of a failing SD card?

The common signs of a failing SD card include slow read and write speeds, errors when trying to access data, corrupted files, and physical damage.

Can I recover data from a failing SD card?

Yes, you can recover data from a failing SD card using data recovery software. However, it is important to stop using the SD card immediately to avoid further damage.

How can I prevent SD card failure?

To prevent SD card failure, you should use high-quality SD cards, avoid using SD cards in extreme temperatures or humidity, and avoid removing an SD card while data is being written to it.

Conclusion

Checking the health of your SD card is important to ensure that your data is safe and secure. By following the steps outlined in this article, you can check for physical damage, errors, capacity, and speed to determine the health of your SD card. If you notice any signs of a failing SD card, it is important to stop using it immediately and recover your data using data recovery software. By taking these steps, you can ensure that your data is always safe and secure.